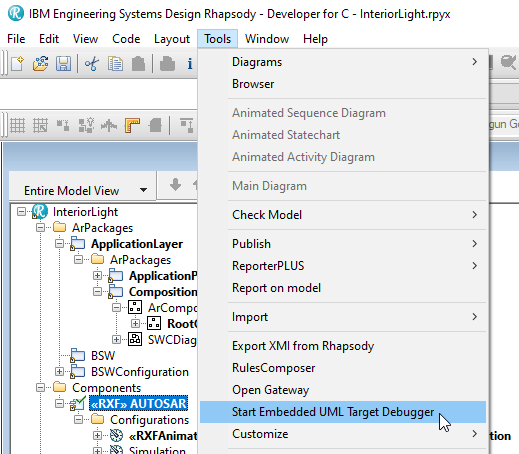
Open the Rhapsody project InteriorLight from the directory <ARXF_CP_V8.0.1 installation folder>\ARXF_CP_V8.0.1\Samples\AUTOSAR\Model\InteriorLight\ARUML
(the SysML folder contains a model used as example in M2M)
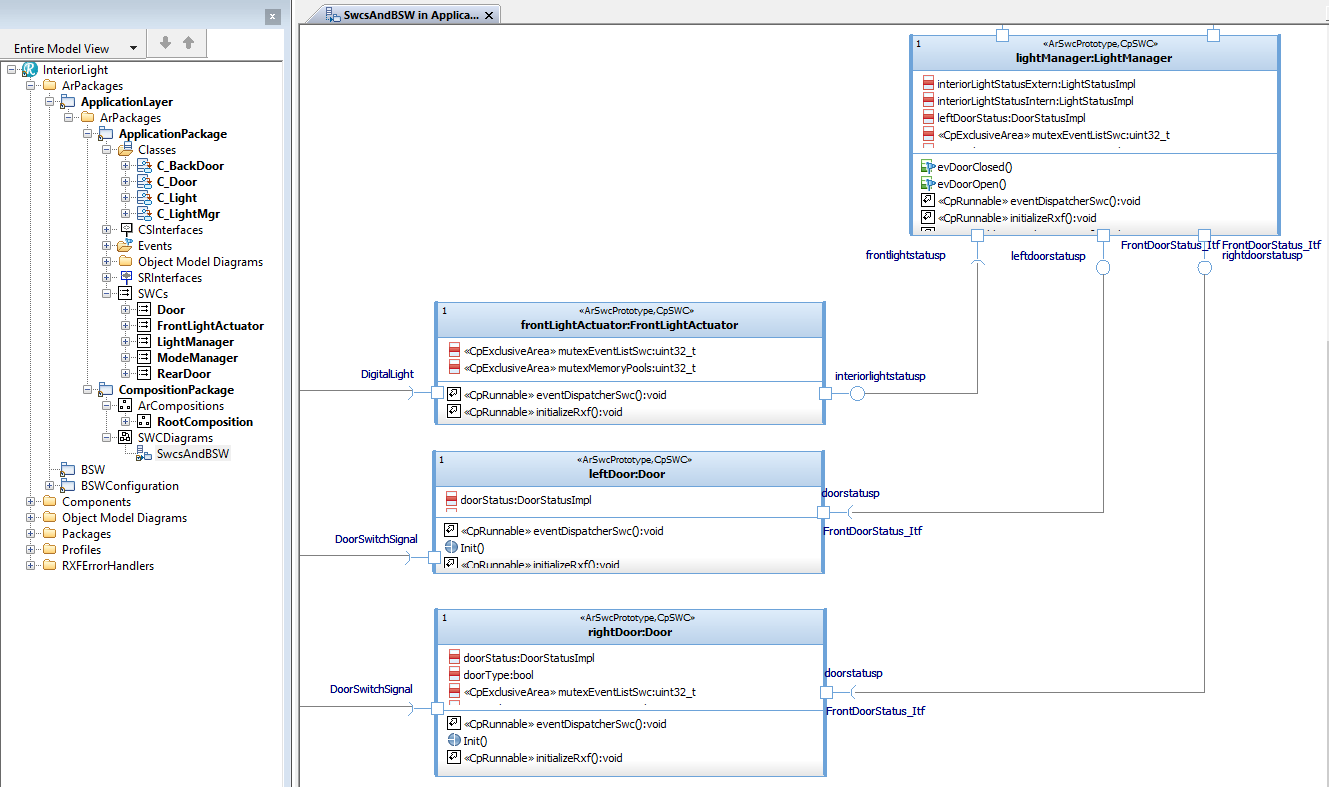
The SWCDiagram shows you prototypes of SWCs and how they are connected via AUTOSAR ports; both client/server ports used to call or provide an operation and sender/receiver ports used to send and receive data.
For the sake of simplicity, the Basic Software is not modeled: the Mode Manager is not implemented, nor is CAN used. To show the use of a self pointer in SWCs which support multiple instantiation, the door is instantiated in a left- and a right door. The LightActuator also supports multiple-instantiation, to inspect code of the generated mini-RTE.
Each SWC prototype has one part; each SWC contains a class prefixed by C_ with a corresponding name. Such class implements the Internal Behavior of an SWC, although one can also model a statechart directly in an SWC to react on different states of the Mode Manager.
We concentrate on the following SWCs:
Rte_Write_doorstatusp_DoorStatusImpl() which is called from within the statechart.
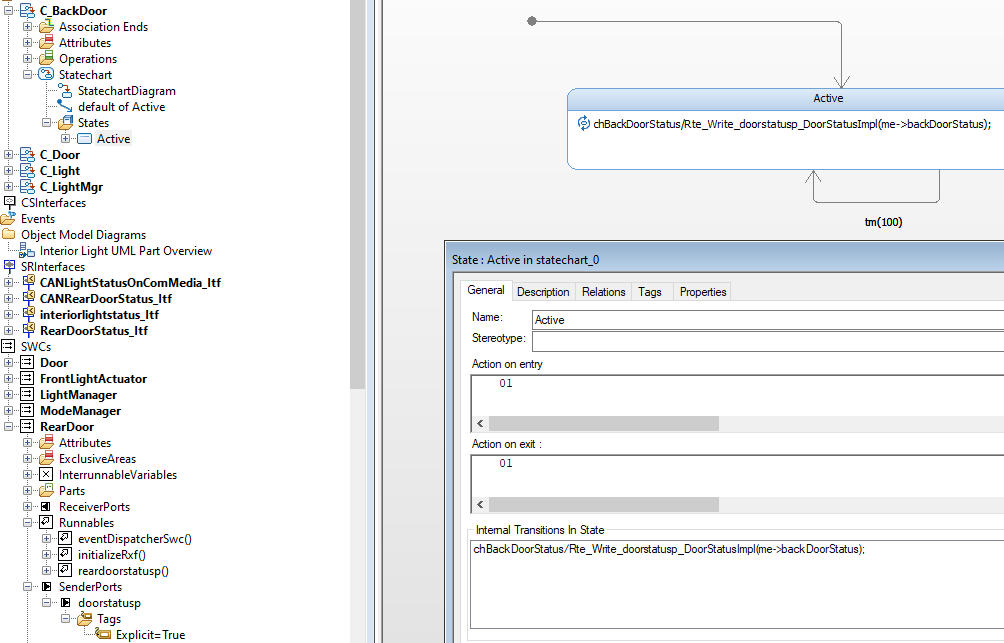
The statechart runs in the context of the runnable eventDispatcher so from an AUTOSAR perspective, the RTE API is called by this runnable. The name of the RTE API is composed of the name of the port and the datatype being send:
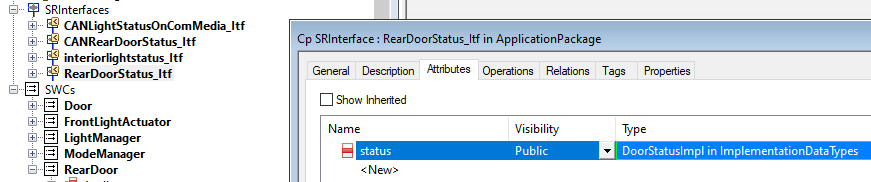
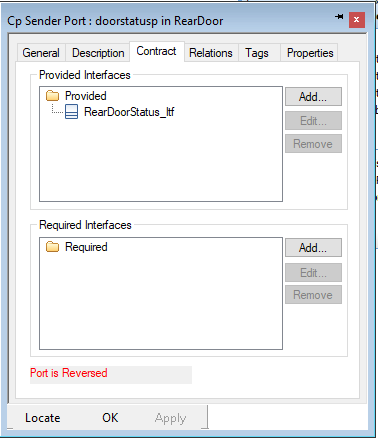
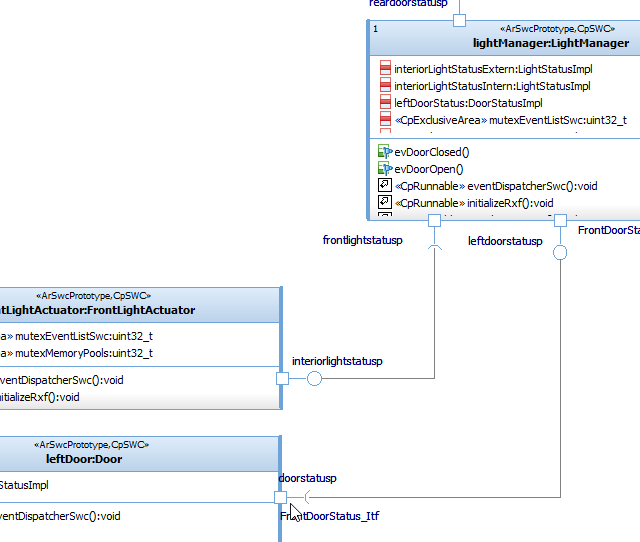
The contract RearDoorStatus_Itf is provided in the sender port doorstatusp which is why the port is set to Reversed (see Ports section Reversed or not)
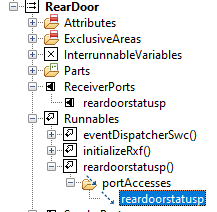
The receiver port reardoorstatusp receives a signal from a delegation port via the CAN bus (not implemented).
Note that the receiver port has a stereotyped dependency PortAccess to a dedicated runnable
which can wait for the signal to arrive:
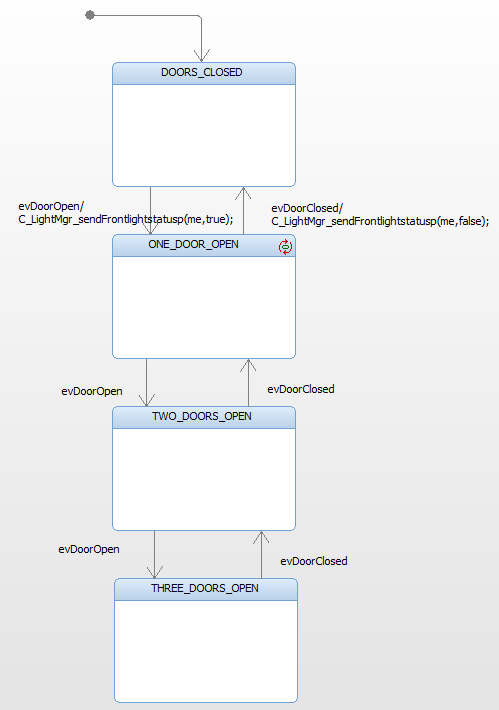
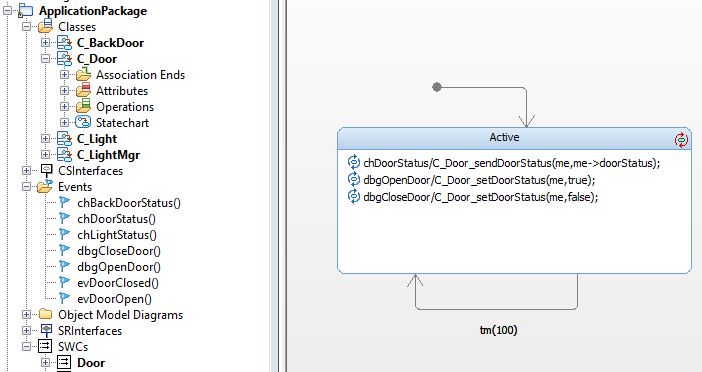
The statechart of the class C_Door reacts on a door opening or closing by setting its attribute doorStatus.
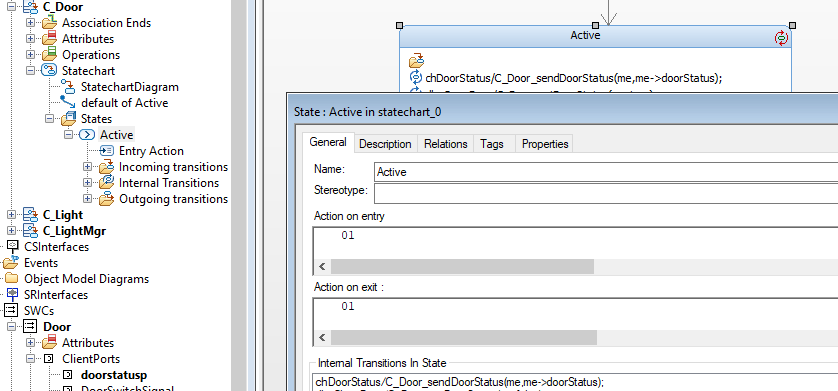
When a Door is polled, it uses the RTE API Rte_Call_doorstatusp_setxdoorstatus() to communicate the attribute.
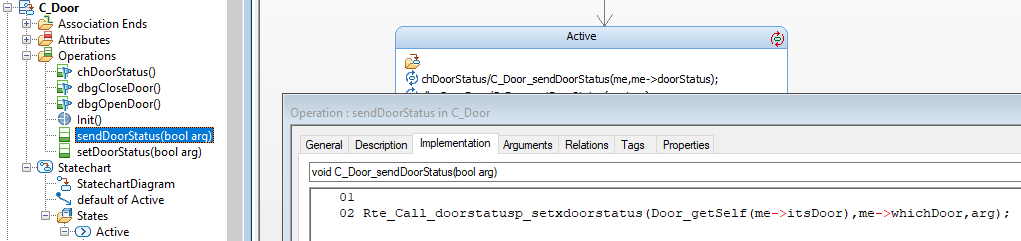
The SWC Door prototype must use its self pointer as first argument in any RTE API it does,
because the SWC has its tag supportsMultipleInstantiation set to True.
Its self pointer or address of the RTE instance of the SWC prototype get be retrieved via Door_getSelf() which is generated
from the rootcomposition
The Door also has a client port DoorSwitchSignal which is connected to the BSW IoHwAb module. This module is of stereotype CpEcu-Abstraction-SWC for which no code is generated. We will see later how we can Inject UML events to simulate the signals by the IoHwAb module.
The C_LightMgr_sendFrontlightstatusp() calls the RTE API Rte_Write_frontlightstatusp_LightStatusImpl()
which name is composed of the name of the port and the datatype being send. The senderport frontlightstatusp has its tag Explicit set to True.
The CpSRInterface stereotyped interface interiorlightstatus_Itf uses the LightStatusImpl of package ImplementationDataTypes.
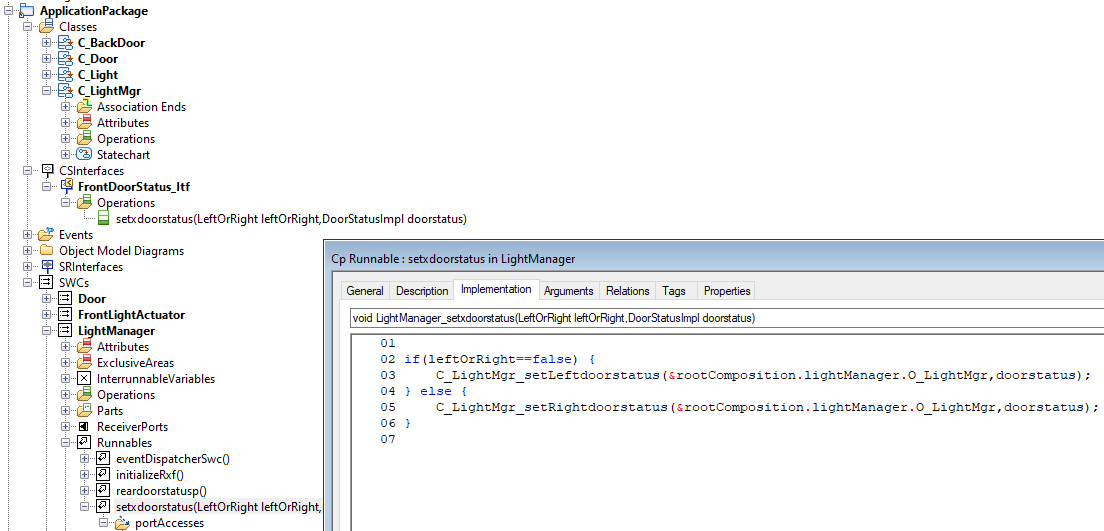
The server ports leftdoorstatusp and rightdoorstatusp use the CpCSInterface stereotyped interface FrontDoorStatus_Itf setxdoorstatus(). Per server port interface, a runnable is used which matches the signature of the interface: you will not find an operation setxdoorstatus() in class C_LightMgr. The runnable setxdoorstatus decides which attribute must be set:
The receiver port reardoorstatusp is connected to the doorstatusp sender port of the RearDoor, described as first SWC above. For a receiver port, a decicated runnable reardoorstatusp in the SWC LightManager is used, which has a PortAccess dependency. The implementation is currently not used, because the Basic Software is not modeled and CAN is not used, so the C_backDoor() can never send anything.
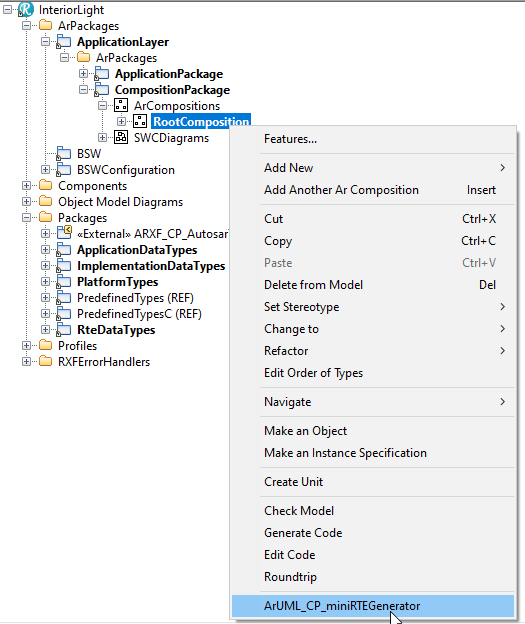
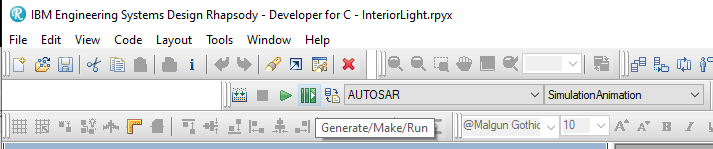
Select the RootComposition and generate a mini-RTE:
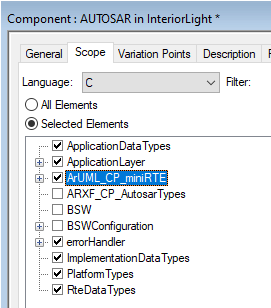
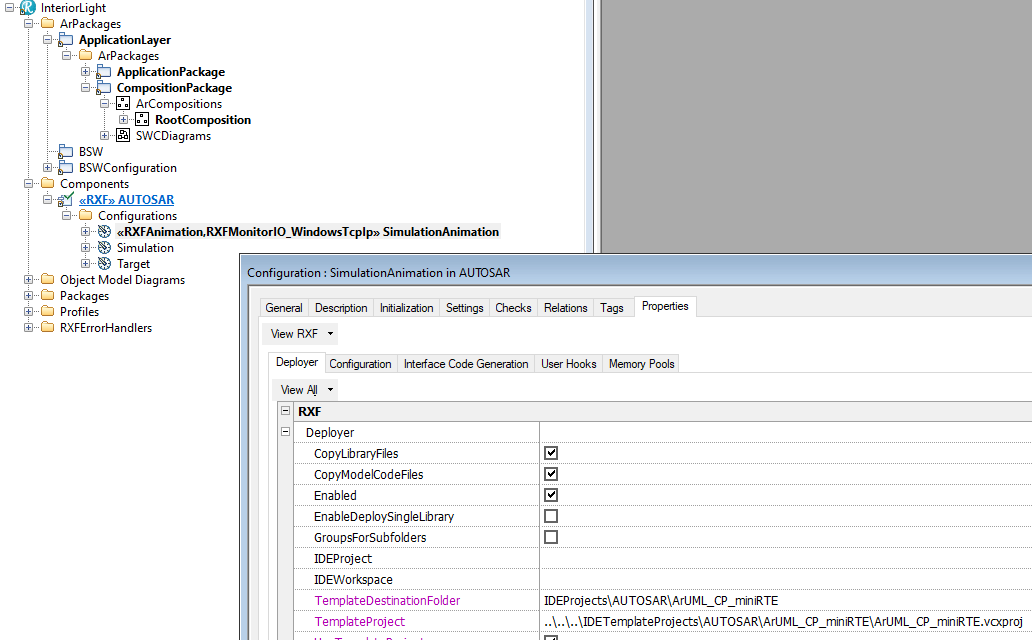
A package called ArUML_CP_miniRTE is added to your model, which you must add to the Scope of the active component so Rhapsody will generate code for it:
During generation of the mini-RTE warnings are shown. These refer to port usage of not implemented connections: you may ignore the warnings. In your own models, you can use the Check Wellformedness Helper to inspect ports and fix problems.

Obviously, when you want to generate code using RTE contracts generated by an AUTOSAR Authoring tool and deploy the model to an AUTOSAR environment, you must add an extra component and not add the mini-RTE to the scope: you want to use the real RTE contracts.
The details on what IDE template is used and other details of a Deployment to are configured in the RXF perspective of the Deployer:
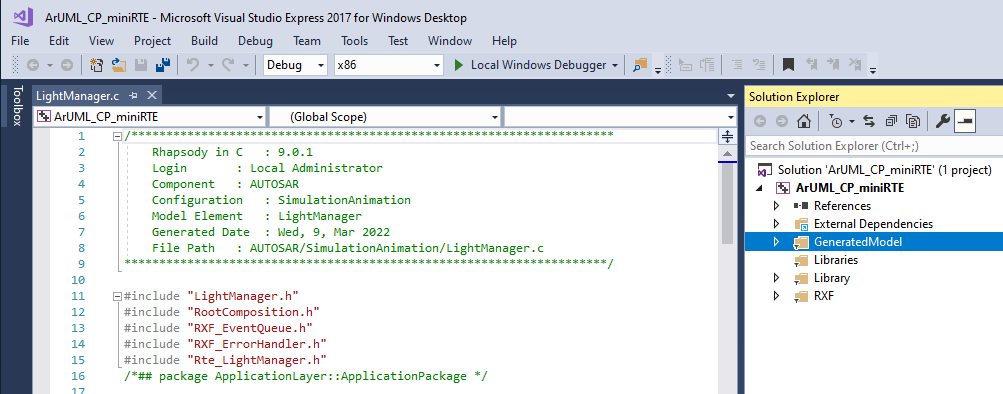
Visual Studio will be launched automatically. The project is populated with your model, the mini-RTE and the ARXF-CP sources:
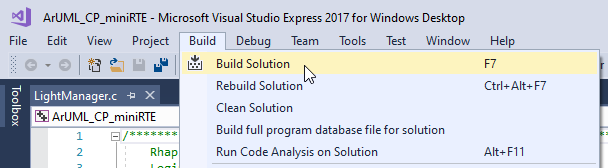
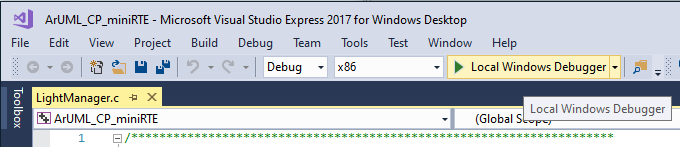
Build the project, but do not start the Visual Studio Local Windows Debugger:
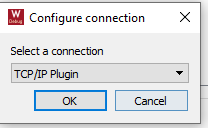
You must configure the Target Debugger Communication channel. Select the TCP/IP plugin to communicate with the mini-RTE:

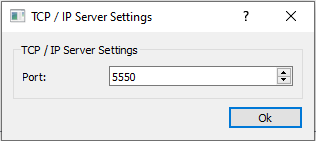
This will allow you to specify a port. Accept the default. Start the Visual Studio Local Windows Debugger:
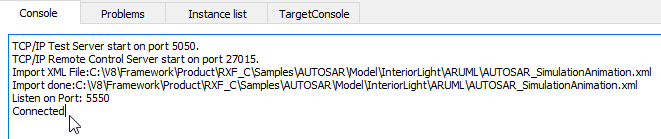
You should see a succesful connection in the Console of the Target Debugger. If not, please refer to UML Target Debugger section TCP/IP.
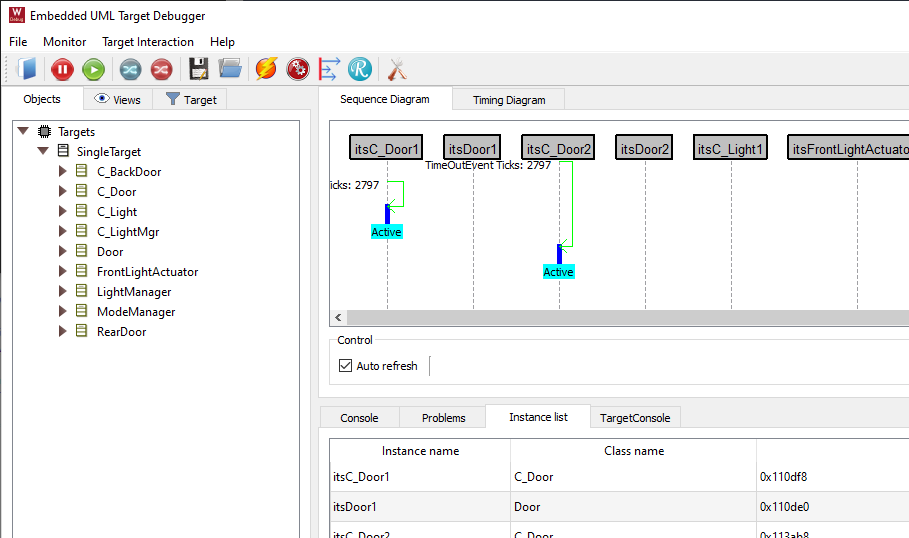
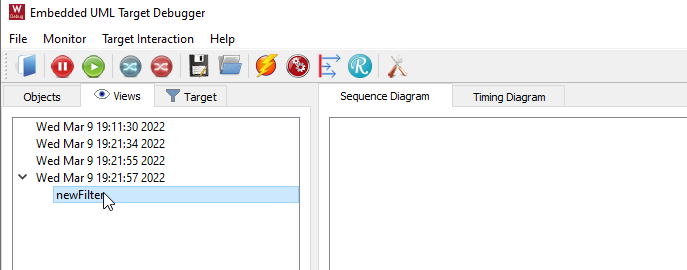
The model has started execution: you see instances of the SWCs and their parts. However, the only thing you'll see are timeout events: nothing is happening yet.
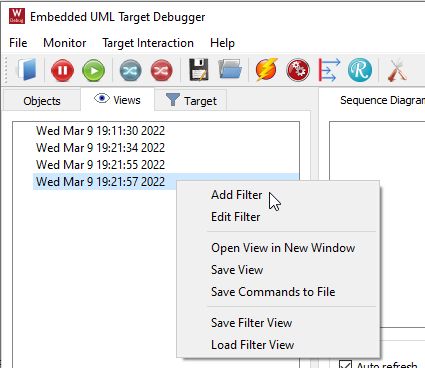
A filter dialog is opened, click on New:
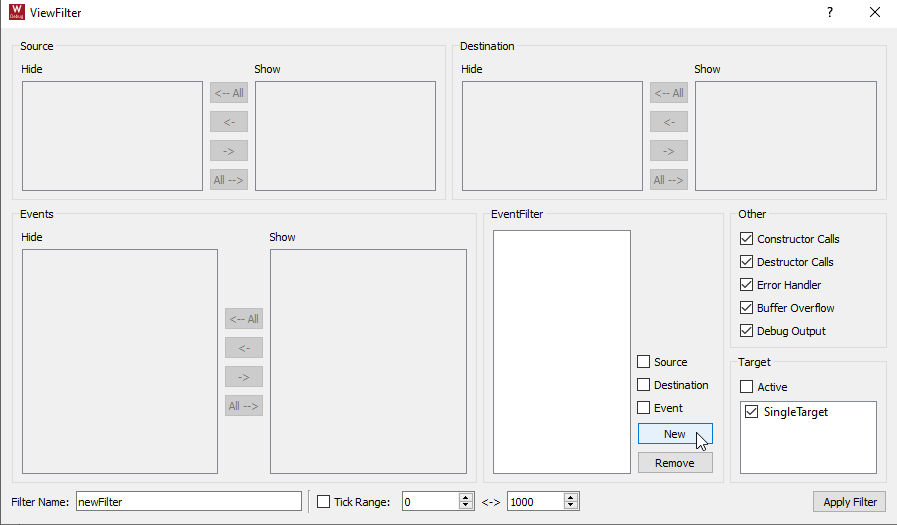
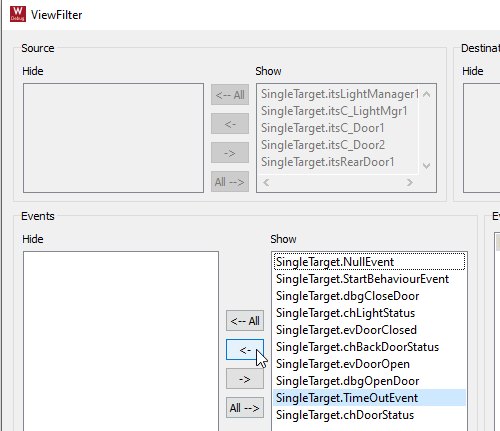
Enable Event to show only events known in the model:
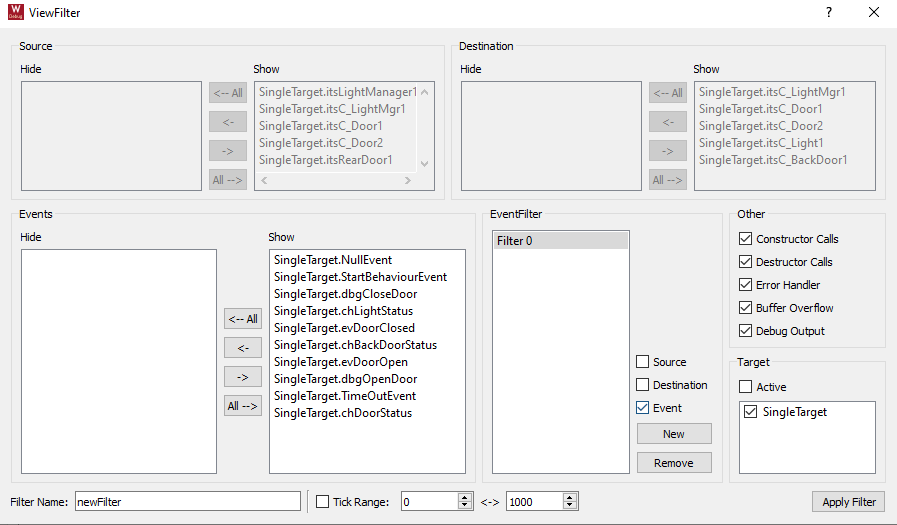
Select the TimeOutEvent and the arrow to Hide it:
Click Apply:

Finally, select the new filter to activate it:
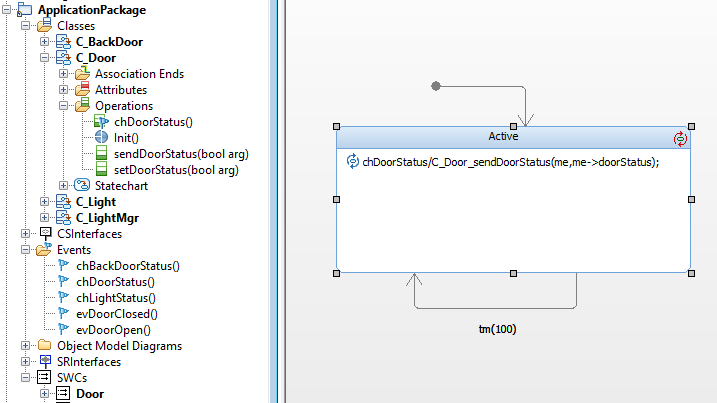
The statechart of C_Door was extended to reply the proper status to the LightManager when it is polling a Door.
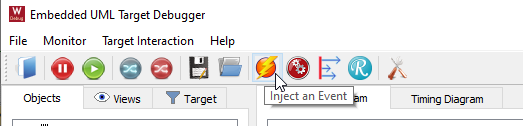
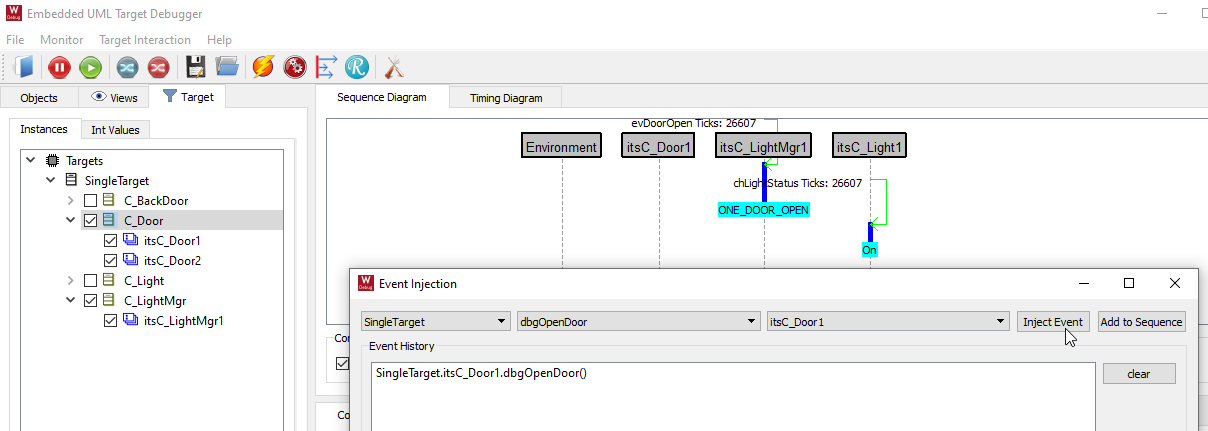
You can inject these events into your model to stimulate behavior of doors being opened or closed:
Clicking this button will activate another Window where you can use the dropdown boxes to select an event and where to send it to:
You are encouraged to read the section Best Practices before starting modeling yourself.